

Choosing a Scope
So there’s a target way out there, and you’re all the way over here. You’d like to hit it with a bullet… and bonus points if that bullet hits where you intended it to!
How do you go about choosing a scope?
Let’s break it down into the common characteristics to look for. A handy set of questions for you to consider before you go picking a scope:
- What is the size of your expected target?
- What is the expected maximum distance?
- What sort of environment and lighting conditions will you be shooting in?
- Do you find metric or imperial measurements easier?
- Do you want more information in the reticle, or do you prefer a cleaner view?
- Is the scope’s weight or size an important factor?
Magnification
How big does an object look?
Here’s the long and short of it:
Your field of vision with a mk. I eyeball is very wide. If you open your eyes and stare loosely ahead, everything you can see at once is your field of vision. You have about 120 degrees of width in binocular vision (vision where both eyes see the object), if you include your peripheral vision. In addition, you have about 130 degrees vertically of binocular vision (mostly because the nose doesn’t get in the way in this direction).
Things in your field of vision take up a certain amount of space. The amount of room an object takes up is measured with an angle, which can be considered more or less like a percentage of how much room the object would take up if your vision were laid flat.
Imagine there’s a triangle extending out, running along the edges of your vision. Your eye is at one point, the apex. The far left and right sides of your vision, out to whatever distance, are the other points. The far end of the triangle (opposite side) is the linear size of the object - the size measured when the image is flat. The angle formed at your eye is the angular measurement.
This means that, proportionally, an object farther away will seem to take up less room in your vision - it’ll cover a smaller arc of angle. Physically, the object is the same linear size. However, greater distance simply means it takes up less room in your vision. If a farther object were to take up the same amount of visual space as a closer object, it would have to be proportionally physically larger.
For example: Take an apple. At 10 yards away, it’s quite visible. At 100 yards away, it’s quite a bit more difficult to play William Tell. The apple is the same size, but it takes up 1/10th of the space in your vision as it did previously - it is 10X the distance, and the perspective stays proportional.

Looking through a scope, the relation is no different. You have some extra magnification, making the object appear larger… though the actual size, physically, doesn’t change.
Which brings us to the most important point - if your target is physically small and far, you will need a great deal of magnification to zoom in on that small arc of your vision. If your object is very large, you will need less magnification to make it easily visible.
Everything takes up a particular amount of visual space depending on its physical size and its distance from you. Depending on your eyes, your target will need to take up a certain amount of room in your vision to be hittable. The amount of magnification to get from normal vision to usable target size can vary widely based on application, location, and person.
How much magnification do I need?
This is always one of the toughest questions we get asked. There’s no straightforward answer.
Here’s a good baseline:
- Look at a target at 100 yards
- Is the target large enough for you to see (and hit) without a scope?
- You can hit a proportionally bigger target at farther distances, or smaller at closer distances
When looking through a scope, it’s often impossible to accurately judge the distance to a target using that scope alone. Depending on your magnification setting, an object at a single distance can appear many different sizes. For this reason, adjustments made to a scope - to change your point of aim - are almost always talked about in angular measurements (more on this later).
While we will be getting into how scopes are adjusted later, these measurements are still useful now in discussing the relative size of an object as it appears to the scope.
For example: Let’s pretend there’s a 10” target at 100 yards. Let’s also assume this is a size you can see. Maybe a little difficult to hit, but visible. At 200 yards, this target would need to be 20” across to appear the same size. At 300 yards, that’ll be 30”. Keep walking it out, and that target would need to be 100” across (more than 8 feet!) at 1000 yards.
Side note : Triangles are proportional. An object 1 inch across takes up 1/60th of 1 degree in your vision. You can zoom in or out as much as you want - it’s still 1/60th of 1 degree of your normal vision. That size is known as 1 MOA - one minute of angle. At 200 yards, an object 2 inches across also takes up 1/60th of 1 degree. This is also 1 MOA. The distances are different, but the room they take up in your field of vision is the same. As the distance changes, the angular measurement changes as well. (in reality, 1 MOA is 1.047” at 100 yards, but that precision only becomes important when you’re reaching very far out)

Ignoring all the peculiarities of ballistics - a 2” target at 200 yards is roughly the same difficulty as a 1” target at 100 yards. These are the same as 3” at 300, and 4” at 400. All are considered 1 MOA in size, talking in angular measurements.
At a minimum, you should use your magnification to at least counteract the distance, making the target appear how it does to your normal vision at a closer distance. If a 10” target is visible to your eyes at 100 yards (10" = 10 MOA at 100 yards), and you want to hit it at 1000 yards (10" = 1 MOA at 1000 yards): 10 times the distance, you’ll want 10X magnification. In essence, your 10X magnification would be making the target at 1000 yards appear as it would to your normal vision at 100 yards.
If your distance is greater, if the target is smaller... you’ll need to up that magnification until it’s a usable visual size.

Let’s walk back out to 1000 yards with our 10” target. With 10X magnification, this target will appear as it does at 100 yards with normal vision (1000 yds / 10 magnification = 100 yards). (I know this seems too little, but we’ve made 1000 yards shots with the M1000 at a maximum of 10X)
This 10" target takes up 1 MOA of space in your vision, which is often considered quite small. Many rifles nowadays, though, are considered sub-MOA - meaning they’re very precise. The rifle may be capable of making this 1 MOA shot, but you may not be able to adequately see the target to make use of that precision. Remember, this is visually equivalent to hitting a 1” circle at 100 yards with no magnification. If you want to make the target appear twice as big and become a little easier to target, you’ll need to double the magnification - 10 x 2 = 20 power. If you want it to appear three times as large, much easier to hit, you’ll need 30 power magnification. Increased distance requires a proportionally increased magnification to make objects appear as they would up close.
Optical systems that run higher than 30 power are often prone to visual distortions, or must be made quite large (as in a spotter scope). I know that higher magnification typically sounds like a sure-thing to make hitting distant targets easier, but it comes with some difficulties.
What if I want to see the bullet holes?
This question is even more strenuous.
At 1000 yards and beyond, you’re probably not going to see bullet holes. Sorry, it’s just too far and there’s too much air and humidity between you two.
The truth of the matter : with a good silhouette target (steel) that’s clean or has fresh paint - you can still see the grey-colored splash of a bullet hitting the target at 1000 yards. You can’t say the same for paper.

To actually see the bullet tear through pressed wood pulp, we’ll have to apply the same math as before.
How much magnification do you need to see a bullet’s effects at 100 yards? Does it need to be double your normal vision? More?
A bullet hole from a .223 caliber is about ¼” across. The paper may tear in a wider circle around it, so let’s estimate the circle is ½” across in total (visibly). At 100 yards, it’s unlikely you’d be able to accurately distinguish a bullet hole from the rest of the paper, especially if there’s more than one hole. You’ll need magnification to
pull the picture closer, and how much you need depends on your eyes. This bullet hole is a ½ MOA mark at 100 yards - just about the limit of human visual acuity, period.
At 50 yards, half the distance, the bullet hole is 1 MOA (the size of the hole didn’t change, so the room it takes up in your vision did). If you can see a 1 MOA target at 50 yards, this is a good starting point for determining your minimum magnification. To see the bullet hole back at 100 yards (double the distance), you’ll need double the magnification of your normal eyeball.
If you can start to see the bullet hole only at 25 yards, where it’s 2 MOA in size, you’ll need it to appear 2 MOA in size when it’s at whatever distance you’re shooting at. At 100 yards, that means you’d need 4X magnification. A ½” object blown 4 times larger through the scope, to appear like a 2” object does to your normal vision at 100 yards.
As you increase the distance, this magnification continues to scale.
Taking the 4X example, the scope would need 40X magnification to see a hole at 1000 yards.
However, high magnification and long distance each have their own issues for the shooter to contend with.
We’ll start with the air:
Air has water in it. It also acts like a fluid itself - it’ll refract light differently under changing temperature and pressure.
The first thing you may notice at that distance is the mirage - the wavy little lines of distortion rising up from the ground. While these can be useful to help tell low-speed wind, they can also distort your view of the target. With enough distance between you and your target, you’ve got a lot of distortion to deal with.
On the other hand, if the wind is high or the temperature difference between the air and the ground isn’t very large, then you may not have mirage to deal with. Instead, you’ll have to contend with the humidity.
In places like Florida, watching the rocket launches from Cape Canaveral, everything but the flame will sometimes disappear. Distance is part of the reason, but the other is the sheer amount of water hanging between you and the object. More distance, more water than can obscure your vision. Higher humidity in your environment, the more water that's between you and your target.
Greater distance is simply more space where slight changes can have compounding effects.
Next to the scope:
Increasing the magnification increases the chance of optical distortion.
A 2 or 4 power scope is generally going to have exceptional sharpness and very clear glass. However, moving your scope up to 20 or 30 power increases the chance of slight misalignments and impurities in the glass being blown up and becoming incredibly noticeable.
The only way to fix this particular issue is either to move down to a lower power or spend a few extra thousand to squeeze that 1% more of visual acuity out of your glass.
Typically, the extra 1 or 2 % of light that gets through the most pristine glass isn’t noticeable by the human eye. Unless you’re reaching out to a mile or more, it’s not worth it.
Summary
The most important question in regards to magnification is - can you see the target with your normal eyes at a certain distance? Now decide how far you want to hit it at. Divide and multiply your distances as needed to arrive at your final magnification minimum.
Brightness
Objective lens size
The objective lens is the lens opposite your eye. It will be either the same diameter of the scope tube or wider (typically wider), housed in an objective bell - the part of the scope that widens out like a bell.
The objective lens is responsible for being the first thing to pick up light. It is also the first thing that can get potentially scratched by dirt or debris you’ll come across. It needs to be clear, tough, and preferably coated with some sort of resistant surfacing.
When it comes right down to it, larger objective lenses can gather more light. In a pretty direct relationship, the size of the objective lens determines the brightness of the scope.
Smaller, tactical scopes may have no bell in order to streamline their shape. This forces the objective lens to be as small as 1” in a 1” or wider scope. These types of scopes will typically be best used in the day, when there is as much natural light available as possible.
On the other hand, some scopes will have objectives of 50mm or 56mm. While great for gathering light, they can be difficult to maneuver. The added size (and weight) can change the balance of a rifle, and may snag on table corners or rifle slings. Additionally, the scope tube will need to be mounted high enough that the wide bell doesn’t contact the barrel. This in turn will force your eye position higher, potentially leading to an unstable cheek weld.
Choosing the objective lens size is a balance between two factors:
Usability - how bulky of a scope you are willing and able to handle effectively, for the given type of shooting
Environment - the amount of light you’ll need to gather will depend on whether you’ll shoot in an open field, under shady trees, or atop reflective desert sands
Tube diameter
The scope tube houses many of the mechanical functions of the modern scope - indeed, at least the two considered most important: Windage and Elevation adjustment.

Somewhere in the middle of the scope tube will be a turret block, which is home to the turrets. The turrets are turned in order to adjust the point of view of the scope, hopefully lining it up with whatever the bullet happens to be passing through. The scope will typically be mounted flat and level with the barrel, which means you’ll often need to point the scope down to line it up with the trajectory of your bullet. Turning the turrets in a modern scope does not move the scope body itself. Instead, they press on and change the angle of the erector unit inside the scope body - this is a piece that moves in order to change your point of view, like pointing a telescope out a window at a different angle. (The window is the objective lens in this analogy)
The turrets need room to screw in and out, and the erector unit needs room to move vertically and horizontally. If the erector unit is pushed to excess, it’ll contact the inside of the scope tube, potentially leading to mechanical damage in any one of the associated components.
A larger tube gives the erector unit more room to move. This gives your scope greater range - as you are able to dial the scope to point at the bullet’s new location farther out / further down. The larger tube also gives the erector unit room to have larger optics, maintaining a high amount of light transmission.
However, as with the objective lens, a larger diameter tube means more weight and more bulk.
Typically, a larger tube often comes with a larger objective lens. It’s rare to see a 1” scope tube with a 50 mm objective - it doesn’t make sense to have to narrow the objective lens’ beam of light to such a narrow area.
If you have a favorite pair of rings, it’s best to start searching for scopes by narrowing down the tube size. This will determine the range of objective lens sizes you’ll have available. Nearly every magnification range can be found with every diameter of scope tube, though larger scope tubes are functionally much better at working for higher magnifications, which are typically used at greater distances.
If you don’t have rings yet, determine your intended use before deciding what diameter scope tube seems applicable.
Summary
If you want to reach out very far, you’ll likely have a thick scope. The size allows the turrets to dial the internal erector unit to a greater angle, giving the scope greater range.
If you want a very small and compact scope, you’ll likely be cutting down on its brightness and overall adjustment range in return for greater maneuverability and lower weight.

Turrets
Am I moving my point of view when I dial? What does impact L or U mean? What is being adjusted in there?
Turrets will typically be marked with the same sort of measuring system used in the reticle. An MOA-marked reticle will typically have MOA-marked turrets. A MIL reticle will use MIL turrets - because you use the reticle to measure, and you dial those same measurements into your turrets to adjust the scope.
When you dial a turret, you’re actually pushing a set of lenses in the scope that are held together in the erector unit. This set of lenses is pushed up, down, side to side, moving your field of view the corresponding angle you have dialed.
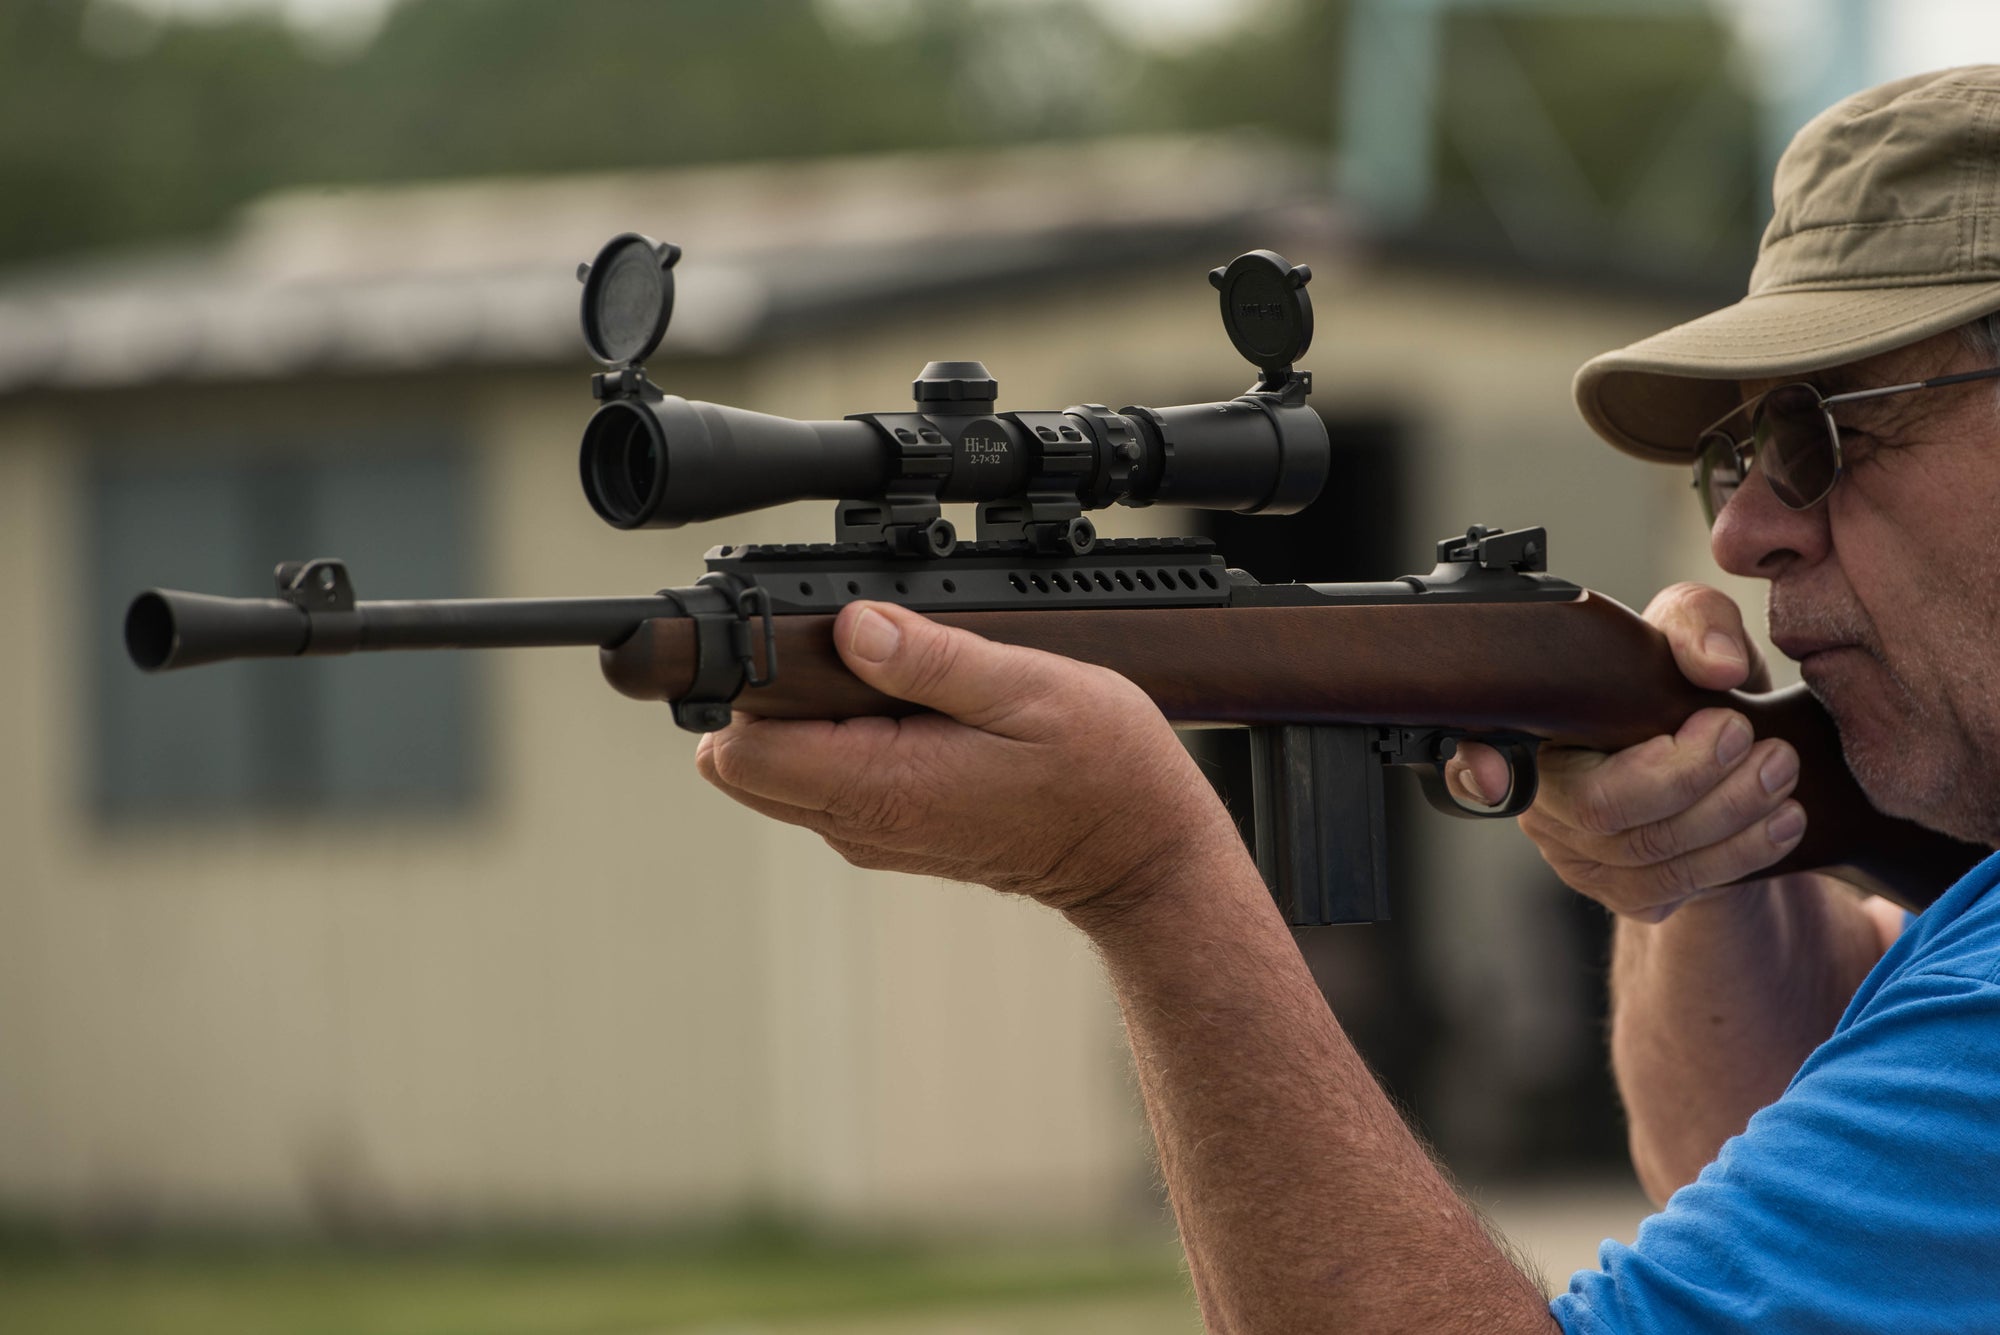
For modern scopes, the turrets are attached to the body. The turrets, just in case the pictures aren’t loading, are the twistable round things roughly in the middle of the length of the scope. There should be at least two - one to adjust the elevation (up-down), one to adjust the windage (left-right). This is not far off from an etch-a-sketch control system.
In addition, you might find dials to control the reticle illumination and parallax. We'll go over those two a little later, as they are not always standard.

Dialing example
Imagine looking through your scope and setting your crosshairs right on your target at 100 yards. You take a shot, and the bullet goes wide.
First test group - the bullets are two feet to the left and a foot down.
Most modern scopes have turrets that adjust the point of impact. Your point of impact in this shot is too far to the left, and a bit low. To get on target, your impact will have to move right and up. Dial the turrets in whichever way (clockwise or counter clockwise) it tells you to move it in the direction you need. In this case, I would dial my impact 24 MOA (24” at 100 yards) right and 12 MOA (12” at 100 yards) up.

Now, when I take a shot, I should be right on target.
Of course, it can be hard to judge the exact spacing and distances without shooting a measuring board, so new shooters will often have to adjust a few times and try things out.
Elevation is typically the simplest factor to figure out. Gravity only goes one way, and you can check the weather for a steady reading of the temperature and humidity (two other other atmospheric factors that have notable effects).
Windage can be more difficult. The wind can be blowing from any direction of the clock, at varying intensities, and can change directions quite suddenly. Generally, it is best to get the elevation spot-on, and adjust the windage as the needs suit you. I personally like to get as close as I can to the average wind for the day, then utilize holdovers for the rest of the session.
Let’s say you’ve got your scope spot-on for 100 yards, and there’s no wind. (Lucky you...)
If you now try to put your crosshairs on the center of a target that’s 400 yards away, the bullet will end up falling short. In your point of view, it’ll go low. Now it’s time to dial up. Remember that the linear equivalent of 1 MOA at 400 yards is 4”. Let’s say the target is up on a stand, and you can clearly see that bullet hit low on the stand - about 3 feet low. That’s 36 inches, or 9 MOA at 400 yards. Dial the point of impact up 9 MOA, and you should be good for a 400 yard shot. Put the center of your crosshair on the center of your target, and wait for the ping as it hits.
If you then go back to shooting at 100 yards, your shot will be 9 MOA high - only 9” at 100 yards, but still off target.
Is it better for turrets to be capped or uncapped?
Depending on your trajectory and your distances, you may have to dial up and down quite a bit. Depending on the windiness and how often you prefer to use holdovers, you may dial left and right quite often as well.
The long and short of it is - if you expect to use holdovers, or you just prefer shooting at one particular distance for a long period of time, capped turrets are your best bet. You’re less likely to bump the turrets and accidentally dial in an adjustment.
If you’re shooting a competition, for example, and you have to rapidly adjust your turrets, you’ll likely want turrets that are uncapped - or that you leave the caps off of. In this case, it’ll also be useful to have larger, easier to read turrets with more defined clicks, so you can have an easier time keeping track of your adjustments in the heat of the moment.
Some uncapped turrets will have a turret lock. This is a way of locking the turret in place, so accidental bumps do not change your dialed setting. However, this lock would need to be disengaged to change your settings, and could slow down your shooting in a fast-paced PRS competition.
Instead of a lock, some turrets have a mechanism that prevents you from dialing below your zero. These type of limits (also known as zero stops) are more commonly found on tactical scopes. While the zero stop must be disengaged when initially zeroing, once set, a shooter can dial multiple adjustments and quickly return to zero, without the risk of losing the zero. .
Some turrets may have the ability to re-index. Let’s pretend you’re finally zeroed in at 100 yards. You’d like to save your settings, so that you can return to the 100 yard zero quite easily from other distances. Re-indexing the turret is the process of loosening the turret (so you can move it without adjusting the scope), turning the turret so that the index on it lines up in the way that you want, then tightening it down. Commonly, once a good zeroing point is found, turrets are re-indexed so that the ‘0’ value lines up with the indicator line when the scope is dialed for 100 yards on elevation.
You could do the same for wind, but it’d be best to wait for a no-wind situation so you can find the actual center.
The Reticle
The scope’s lenses - the magnification apparatus - bring a far-away object into clear view. Once you can see it, you need a way to pick a specific point on your target to send a bullet towards. And, if your bullet is blown to the side by wind or if you judged the distance wrong, you need a way to measure how far off your bullet is. No sense missing the second shot if you know where the first went.
To really pinpoint your shot, your scope needs a reticle.
The reticle is the set of lines (sometimes known as crosshairs) within your scope. Looking through the scope, the reticle should often help pinpoint the exact center of the scope. Some reticles also have other bits of information, such as…

Holdovers. These are marked points on the reticle lines or floating throughout the reticle. These points are meant for measurement, or as an alternative center. If, for example, you fire a shot that ends up missing, you could keep an eye on where (in the reticle) the shot landed. For your next shot, instead of dialing, you could place that point on your target as if it were the center of your crosshairs. You are now holding the reticle over to the side to place your shot, instead of dialing.

This form of holdover is especially common for simple windage and elevation adjustments. If you know your shot is at the right elevation and only need to care about holding off for wind, keep an eye on the MOA or MIL markings on your reticle's main lines.

Some scopes might have special holdover lines below the central point. These lines are often BDC Holdovers - Bullet drop compensation. Your bullet falls as it travels farther and flies for longer. While different firearms and ammunition will have a different trajectory, some setups are fairly standardized. In the above reticle, this is a BDC chart that is quite standard for scout rifles firing .308 caliber. When the scope is zeroed at 200 yards, the lines indicate the drop at 300, 400, and 600 yards. Instead of dialing the scope to put the center of the crosshairs on the center of the target, you can instead look a little higher and line up the appropriate holdover with the target instead.

Your reticle may not entirely join at the middle. Instead, the center point or cross may float, giving you a clear view around the very center of your target. This can be handy for precision shooting, or in events when your reticle might be too thick and obscure your target. Meanwhile, the long lines extending outward from the center help draw the eye to that middle point.

Meanwhile, some second focal plane scopes have a ranging scale. As you zoom in and out, objects in your field of view change size and your reticle stays the same. If you line up the ranging scale with an object of known size, you can zoom in and out until that object fits its size on the scale. At that point, by looking at the magnification and applying some math, you can easily figure out the distance.
The size, or thickness, of the reticle becomes more and more important as either your target gets smaller and/or your distance increases.
If you’re looking at a nickel 1000 yards away, having crosshairs that are thicker than that nickel in your field of view will make a precise shot nearly impossible. On the other hand, having reticle lines so thin that they wash out will make getting on target a more laborious, focused process. There’s a balance to reticle size, and that depends largely on your target size and its distance.
You might’ve heard about red-dot sights with a 1 moa dot or somesuch. The reticle in your scope may have a floating center point that's 1/2 MOA wide. This is all part of the reticle's thickness, which could be different in different portions of the reticle. For example, the main crossing lines nearest the perimeter of your vision will typically be thicker - this portion of the reticle is less used for shooting, and it helps draw your eye to the center. You'll typically want to check the thickness of the lines that intersect the center, as they will be overlaying your target.
Reticles often have their thickness and other dimensions measured in the same way as your target will be measured. For instance, a reticle might have lines 1MOA tall. This means that you can use their height to confirm the size of a target, if you know it ahead of time. On the other hand, the reticle lines may be 0.1 MOA thick. This means that your lines will obscure an object 1/10th of an inch at 100 yards - roughly half the width of a .22 hole. At 200 yards, that reticle would obscure the entire bullet hole.
“Theoretically, studies have shown, the best we can do is about 120 pixels per degree of arc, a unit of angular measurement.”
There are 60 MOA in 1 degree. So, theoretically, we can see things about 1/2 MOA in size with the naked eye - provided it’s illuminated and contrasting with the background. To see something that takes less than that amount of space in your vision will require magnification. And, depending on how small your target is, you need a reticle thinner than that.
Focal Planes
There are generally just two focal planes - First Focal Plane and Second Focal Plane. Some rare scopes might use both, but by and large it’s one or the other. These terms refer to where, in relation to the magnification apparatus, the reticle sits.
Second Focal Plane
A second focal plane scope has a reticle that stays the same size, no matter the magnification. You can zoom in all the way, get a clear sight of your target, and pull all the way out to scan the field - the reticle will appear exactly the same. This means that the scale on your reticle is generally only true at one magnification (often the highest magnification). To figure out the marked values at other magnifications, you’d need to apply a bit of math. This may seem like a detriment, but it does give you a reticle that’s just as easy to see at high magnification as well as low magnification. This is also how the ART system works - allowing you to zoom your sight picture in and out until something you can see (of known size) fits to an unchanging portion of the reticle. Once the target fits, you can use the magnification value to figure out the distance.
First Focal Plane
A first focal plane scope has a reticle that is tied to the magnification. As you zoom in or out, the reticle magnifies or shrinks as well (and yes, this will cause the outer portions of your reticle to appear or disappear). This means that the holdovers indicated on the scope will always be true. 1 MOA marked on the reticle at 5x magnification will be the same as 1 MOA at 20x magnification - remarkably helpful in dialing adjustments in the heat of the moment. The downside to this is that your reticle may seem thin, small, and hard to read at the lowest magnification. At the highest magnification, the thickness of the lines may get in the way of you seeing your target.
When is one better than the other?
It truly depends on your own preferences, your target, the distance, and the intended use. If you prefer a constant size reticle and tend to run your scopes at only maximum magnification, then SFP and FFP scopes will function the same. The only difference at that point will be the reticle design and thickness.
If you’re regularly changing magnification and trying to use holdovers in a precision shooting match, the repeatable sizing of an FFP scope’s reticle will be incredibly useful.
If you want to use your reticle to size your target and judge distance, a SFP will make the whole process easier - although, if you’re good at quick math and have good vision, a FFP scope can do a similar job in many circumstances.
Each has a purpose, though both serve the job of assisting you to guide your bullet toward your target.
Adjustment Values
Adjustment values for scopes are discussed in terms of angular measurements. Because the distances may always be different, and you may not know the size of the target at any given moment, the scope needs to be adjustable and measurable in a format that is repeatable at the scope level. So, the scope adjusts with angular measurements, because that is a repeatable way of measuring how the optical path is mechanically moved. Deciding how much angular change to make for a particular distance is a large part of understanding your ballistics.
If you zero at 100 yards with one scope and dial 9 additional MOA to reach 400 yards, that change in value should be the exact same on any other scope. Regardless of the scope, angular measurements are the same (unless your scope is defective... in which case dialing 9 MOA might only result in 3).
MOA
There are 60 minutes in 1 degree.
Time to walk through the math - Let’s draw a triangle, with our eye being the narrow point of it. From our eye, the triangle extends out, 1 degree wide. Going out to greater distance, that triangle steadily gets wider and wider, at an even proportion of 1 degree. At 100 yards out, the triangle will be 1.745 yards across on the opposite end - about 62 inches. We can divide this triangle into 60 slivers of 1 minute wide, which is spread evenly across those 62 inches. At 100 yards, as you’ll recall, I’ve been mentioning that 1 moa is 1”... but this isn’t the exact truth.
62 inches / 60 minutes = 1.047 inches/minute
In reality, 1 MOA - real MOA - is 1.047” at 100 yards.
There are 60 minutes of angle in 1 degree, and this relation is true and proportional all the way out. An actual MOA is 1.047” at 100 yards, which really only comes into play when very far away or when precisely measuring a very large target.
Some simple explanations for MOA:
Shooter's MOA is the easier-math version of actual MOA. In Shooter's MOA, 1 MOA is 1” at 100 yards, 2” at 200 yards, 3” at 300 yards, and so on. It’s a steady multiplier of 1” per 100 yards.
With actual MOA, you can see the effect this has at greater distances - at 1000 yards, 1 MOA is about 10.5”. If you needed to dial up 4 MOA, shooter’s MOA would give you 40 inches. Actual MOA gives you 42”. And sometimes those 2 inches really matter.
At a distance of 1 mile, 1 shooter’s MOA would equal 17.6”. Actual MOA would be 18.4” That’s nearly a whole inch of difference being incurred every few clicks.
MIL
MIL is just as proportional as MOA. Remember - we’re working with triangles here.
MIL is usually expressed as a simple relation - 1/1000th of the distance. So, at 1000 yards, adjusting your scope by 1MIL would move your point of view 1 yard (linearly). At 1000 meters, a 1 MIL adjustment moves your point of impact 1 meter.
This system works quite easily when thinking in metric, due to the proportionality of the measurements. At 100 meters, 1 MIL is 0.1 meters of adjustment - 10 centimeters.
In imperial, it’s a little peculiar, but still manageable - 100 yards would yield 3.6” per MIL (0.1 yards).
Summary
MILs sound like very large movements up front. Why dial 3.6” when I can dial 1” with an MOA adjustment? That's because both systems have even finer divisions. Often, on an MOA-adjustable scope, the finest adjustment you can do is ¼ MOA per click. ¼” at 100 yards - about the width of a bullet hole. Fine enough for me! And with MIL, the scopes usually adjust by the 1/10th MIL - about 0.36” at 100 yards. Also about the size of a bullet hole.
Both systems allow for great precision. What it comes down to is what you’re more comfortable with. In reality, both systems are just as straightforward to use. If you understand one, you have all the knowledge necessary to understand the other. And the triangles never change.
Focus
Sometimes, people will talk about focusing a scope. In a scope, there are generally 2 areas of focus - the diopter and the parallax adjustment.
Eyepiece / Diopter
At the eyepiece, you may be able to turn the most outward portion of it - the part closest to your eye. Adjusting the eyepiece in this way adjusts your focus on the reticle. If you wear glasses or have had corrective surgery, this is a great way to get the scope set up for your vision, so you can clearly see the reticle in detail. Once this focus is set, it can be left unchanged until your glasses prescription changes.
Parallax
On the other hand, parallax is changed depending on the distance to your target.
The reticle and the scope’s glass work together to line up an optical path. This is the path the light takes from the target, through the scope, past the reticle, and out to your eye. The target and reticle need to lie on the same focal plane to prevent parallax shift. If they do not lie on the same plane, any slight movement in your eye position will cause the reticle to float over the surface of your target.
Parallax shift is difficult to describe with words alone, so the next GIF should make things easier. It's an exaggerated example, but not by much. Imagine that the target is at 100 yards, and the parallax is set for 500 yards.

Parallax shift is a major contributor to missed shots when set improperly or ignored, especially if your head position is not perfectly consistent. In the absence of a good cheek weld or consistent head position, it’s important to set your parallax properly to ensure good focus and a non-floating reticle.
Parallax is often set by a dial on the left side of the turret block, or by turning a portion of the objective bell in other scopes. Some scopes have a pre-set parallax distance, and it’s important to keep this distance in mind when figuring out why shots may be going an inch or two wide at other distances.
If your head position is perfectly consistent all the time, parallax will not matter to you. Unfortunately, this is rare. Even monks have trouble staying perfectly still sometimes.
Illumination
An illuminated scope does not mean night vision or infrared or a flashlight. Instead, it means that there’s a small light inside, set up to illuminate a portion of the reticle. Without illumination on, the reticle will appear with standard black lines and will remain usable.
Shooting a dark target or a target in the shade, your reticle may be difficult to distinguish. In situations like this, it’s useful to be able to make the reticle light up a bit with a clearly discernible color, to help it stand out.
Commonly, there are two colors for illumination -
Red. The human eye does not pick up red as well as other colors, but it also does not mess with your pupil dilation as much when in darkness.
Green. The human eye picks up much more detail in green, but it could throw off your eye’s sensitivity to dim lighting.
Make sure to pick a color that suits you, and then turn it to the appropriate brightness for the situation at hand. Typically, there’s little to no need for illumination when shooting a target that’s sitting in broad daylight. If you do turn on your illumination at that point, it will likely not glow with as much intensity as you’d expect - you’re trying to get the reticle to glow with a light brighter than sunlight. The human eye is not fond of that quantity of photons, and most LEDs can’t produce that intensity of light anyway.
Many scopes do not have illumination. As I'm writing this, I realize that I've never turned on my scopes' illumination for anything other than to make sure it works. My favorite scope doesn't even have illumination. I think you'll use it less frequently than you'd expect at the onset.
Height of the scope
The scope sits some unchanging distance above the bore once you've got it installed properly. (If it jumps, please check your rings or rail for a loose fitting)
Many shooters try to get their scope as low to the barrel as possible, but that isn’t always possible.
Should I get the scope low? How do I deal with a tall scope?
The main concern with scope height lies in two areas -
If the scope is too low, it’ll contact the barrel or receiver. If you tighten the scope rings while the scope is pressing down on a hard surface, you may damage portions of the scope. On the other hand, if the scope isn’t initially damaged by tightening the rings, it may still be damaged every time the rifle fires and the recoil causes vibrations to move through the scope’s more fragile lenses. Imagine the objective lens housing slapping down on the barrel every time you fire (or imagine the barrel jumping up and slapping your scope).
On the other hand, if the scope sits very high, you’ll never get a good cheek weld and head position. Your face will be just so darn far away from the stock that it’ll be floating, unsupported. This makes it difficult to line up your eye and eyepiece in a repeatable, easily found way. If the scope is too high and you need to raise the support for your head, you can add cheek pieces to the stock of your rifle, giving your face a place to rest. This will all add to how unwieldy the rifle is.

You’ll want the scope to sit as low as possible without it contacting anything but the rings. If you can’t get it that low or don’t want to order parts online to test out, then having a little extra room is perfectly fine. Just make sure you can maintain a cheek weld for more accurate, repeatable shot placement (especially if your scope does not have parallax adjustment).
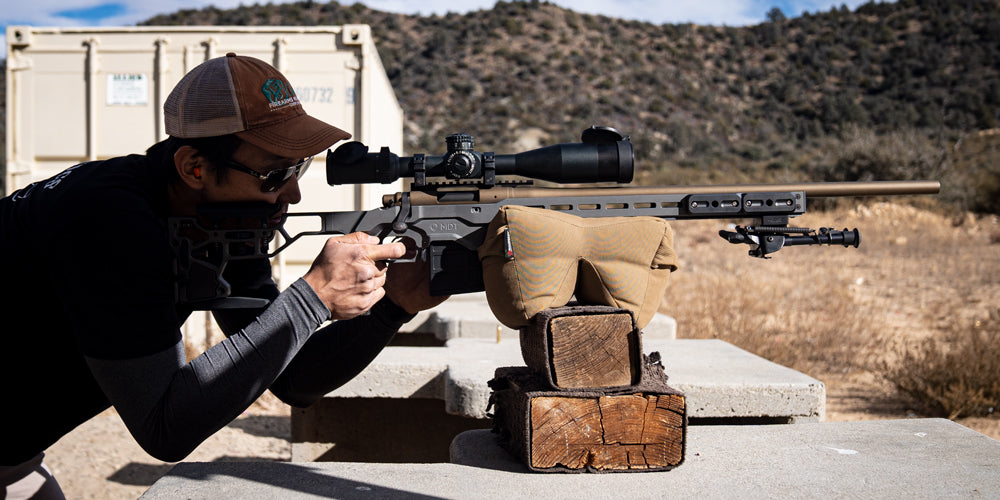
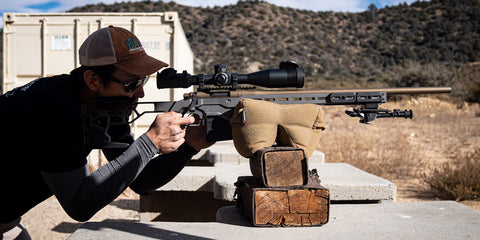
Size & Weight
Depending on your application, size and weight may figure in immensely or not at all.
For the average bench shooter or competition shooter, the weight and size of the scope are only important when they become a problem. When you’re at the bench - either sandbagged or on a bipod or some other support - the rifle’s total weight helps to counteract recoil. More rifle weight equates to less felt recoil. Some competition rifles are specially weighted for just this purpose, and can weigh upwards of 15 or 20 lbs. Not every rifle in a competition is going to be this heavy, but the scopes will often be quite sizable to ensure high magnification, high light transmission, and extended adjustment range (a larger turret block and larger scope tube mean more room to move the erector unit, which handles adjustment shifts). If the scope is too heavy and the rifle too light, the rifle could be prone to tipping over, if it isn’t just outright unwieldy. As long as the scope is not making the rifle difficult to handle, then it’s a good size and weight.
For hunting (or anything that takes a lot of trekking on foot), size is an immediate factor and weight is soon to follow. Large, exposed turrets can hit against branches or tree trunks, potentially dialing them accidentally. The weight and position of the scope may come into play when shooting offhand or pulling up for a snap shot. However, hunting is often done in the shady cover of trees, where a larger tube diameter and large objective lens could provide beneficially higher brightness than a compact scope. Finally, weight builds up over time. Consider the length of time you’ll be trekking, as well as your own level of fitness. Shaky, tired hands make for missed shots.
For tactical, run and gun shooters, weight and size are constant concerns when handling the rifle. For one thing, large objective lenses or broad turrets can snag on corners or clothing - and typically, you won’t need to be dialing at the kind of close distance these tactical courses are normally run at. Weight also factors into the balance and recoil of a weapon, much more than for a bench shooter.


Thomas Clarence
May 08, 2024
It was interesting to me when you mentioned that size is an immediate factor to consider when purchasing optics for hunting. I would think that it would be a good idea to find a gun shop in your area that has a large selection of optics that you can look at in person. Looking at the optics in person seems like a good way to get exactly what you are needing. https://kentonindustries.com/pages/custom-turrets