


Today we’re going to take a look at how to use a ballistics calculator to determine your initial cam setting for the M1000 PRO and the M1200 XLR ART scopes. So, we’re using JBM ballistics - a free ballistic calculator online. [To access the ballistic calculator, you can click on ballistics on the left side bar, and then click on the first link, trajectory, under general trajectory calculators]
This will bring you to the JBM ballistics calculator. This page is where you input your specific bullet data. You can select a bullet from the bullet library drop down menu. If it’s not there, you can manually enter your bullet data.
First row: where you enter your bullet coefficient, bullet weight, and your bullet caliber.
Second row: where you input your muzzle velocity.
Third row: your offsets - for how high your sight is compared to your barrel.
Fourth row: wind speed and the wind angle.
Fifth row: your target speed and your target height - this is useful if you’re trying to lead a moving target.
Sixth row: your zeroing range. This is important for the ART scope. The ART scope requires being zeroed at a specific zeroing distance in order to get the ballistics data to be properly calibrated. You need to make sure that the zero range is set to the specific zeroing distance of the scope. For the art M1000 PRO it’d be a 200 yard zero. For the Art M1200 XLR it’d be a 300 meter zero.
Seventh row: atmospheric conditions, which we’re just going to leave at standard atmospheric pressure and temperature, and we’ll leave the altitude at zero.
Last row: some specific settings for the calculator, which we’re just going to leave as is - but we want our distances to be in yards, so I’m going to leave this one checked.
For our example we’re going to be shooting a 55 grain, Federal XM193, .556 NATO round out of an AR15 SBR (‘short barrel rifle) with an 11.5” barrel. I’ve looked up the ballistic data: our ballistic coefficient is .246 using the G1 drag coefficient. Our muzzle velocity is going to different from what’s listed by the ammo manufacturer. Because we’re shooting out of an AR15 SBR with an 11.5” barrel, we’ve actually chrono’d the muzzle velocity to be around 2850fps, so we’re going to use 2850 for the muzzle velocity instead of what’s listed from the ammo manufacturer. Our caliber is .223 - but the actual size is .224”. Our sight is roughly 3 inches above the muzzle - this is for the m1000 pro. We’ll leave the wind speed and the target speed and all that at the default settings, not too concerned with this at this time. Zeroing distance will be 200 yards. And let’s just leave our range increment at 25 yards. We’ll leave the temperature and atmospheric pressure at standard. Zero feet altitude and ranges in yards.
When you’re done, press Calculate.
This brings us to the output that the ballistic calculator had generated after you input your bullet data.. The first column is the yardages, the second column is your drop at each distance in inches, and the third column is your drop in MOA. So, it shows that we’re shooting the 55 grain .223 that’s coming out at 2850 feet per second.
The third column is actually the column that we’ll be focusing on when setting our initial cam setting.
With this ballistics data, compare the drop data at each of the distances out to your maximum effective range. To find the initial cam setting for the round that you are shooting we recommend that you first consider what your maximum effective range will be. So out of an 11.5” SBR in .556, we think our maximum effective range for this will probably be around 500 yards. So, we’re going to take a look at this and try to find the best setting in the cam setting chart that fits the trajectory of this round.
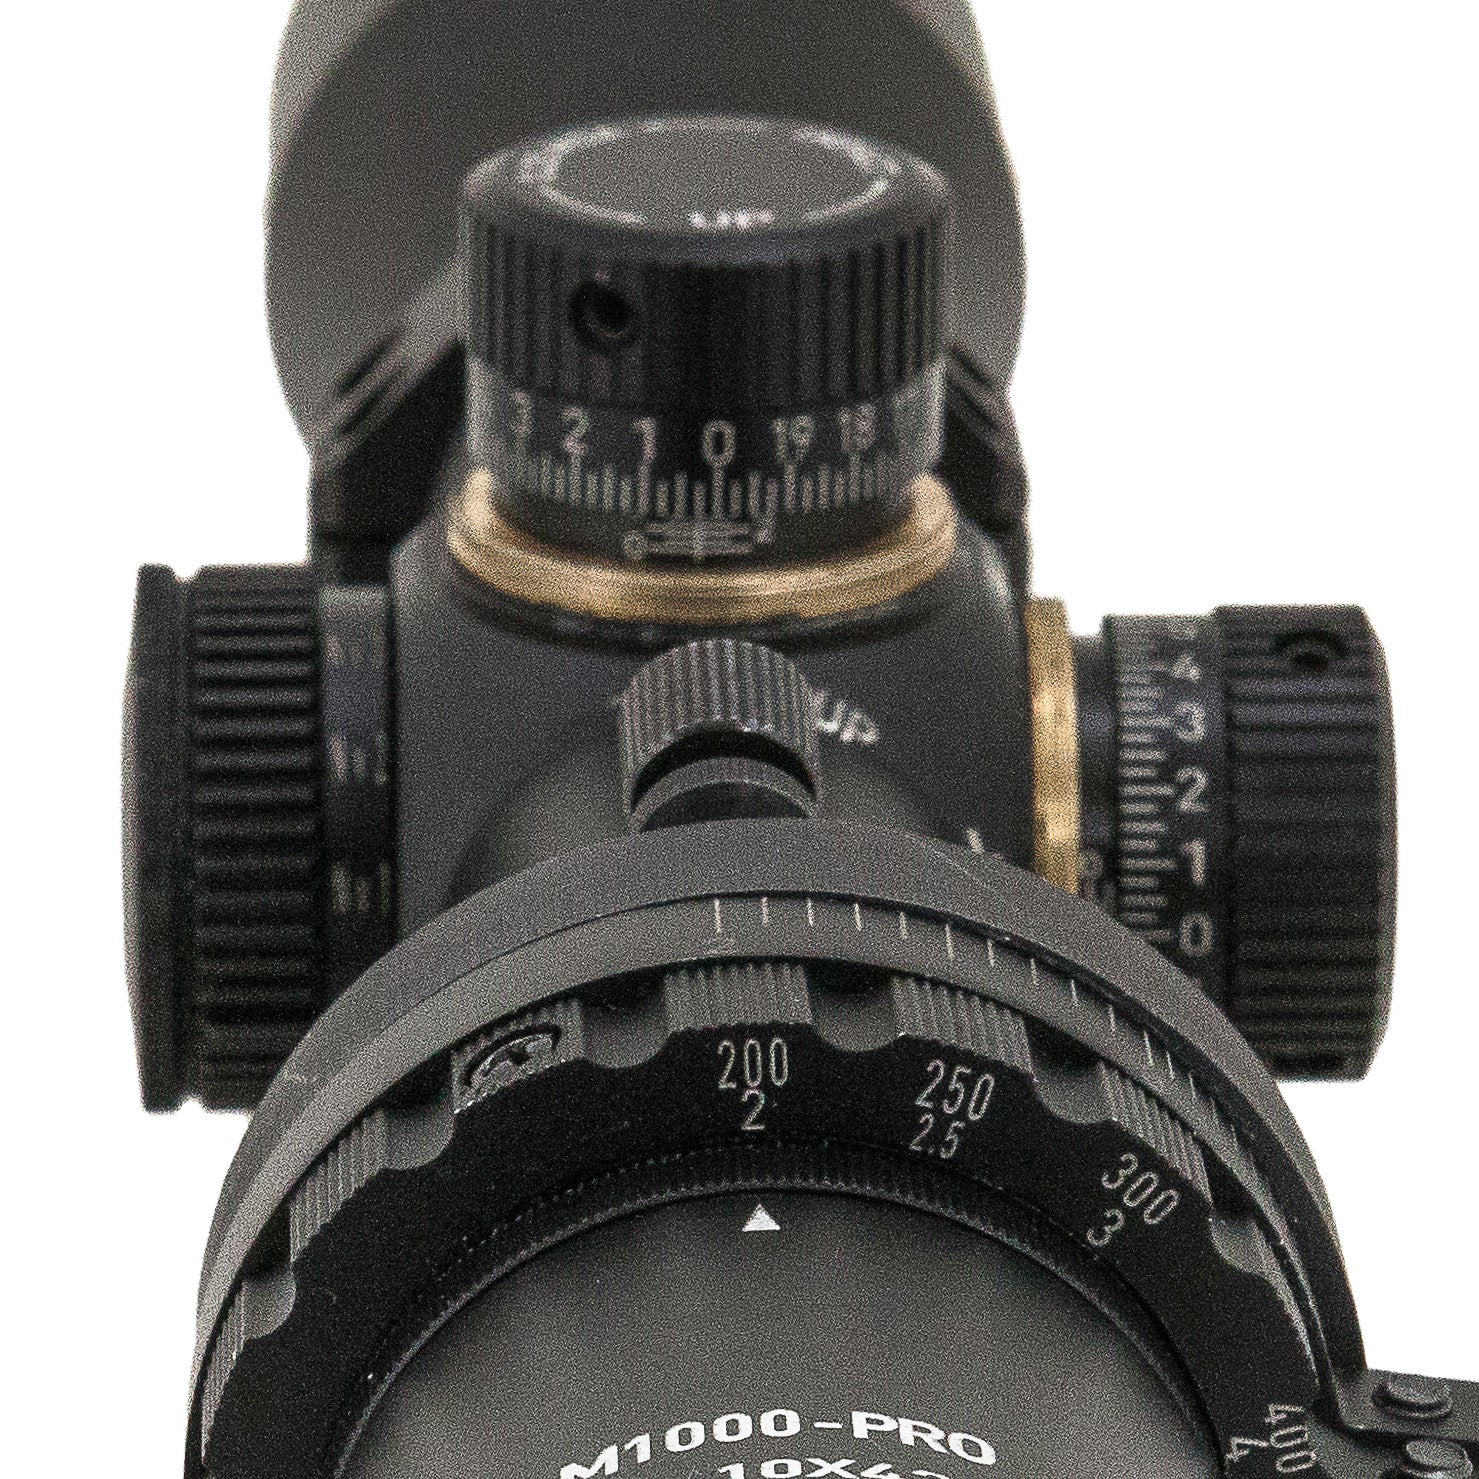
Referring to the trajectory chart in the manual on page 19, we’ll be looking at these columns to try to find the setting that best fits the curve of the bullet that we’re shooting. Looking at 500 yards, we need about 12 MOA (or 11.9 MOA), so that’s pretty close to somewhere right around cam setting 330. At 500 yards the cam is giving us 12 MOA of adjustment and we need 11.9 - that’s fairly close. That’s less than a half-inch spread. At 400 yards we need 6.8 MOA, and we’re getting 8 from the cam. That’s fairly close, about 1 MOA off - so it’d be about a 4 inch spread at 400 yards. Still center of mass, still works pretty well. 300 yards, 2.8 MOA, we’re getting 3 from the cam - that’s spot on. And of course, 200 is our 0, so this is 0.
Just taking a look at this, a good initial cam setting to start on for this example is cam setting 330. With this you can initially set your cam and then, at the range, you can calibrate your cam setting.
As a general rule of thumb, if you’re shooting low, adjust the cam setting slightly lower. If you’re shooting high, adjust the cam setting slightly higher.


Leave a comment (all fields required)